Profiles are used to enable or disable features or restrictions on an iPad (such as requiring a passcode or disabling the camera). Profiles are assigned to devices via Assignment Groups; multiple Profiles can be applied to an iPad.
If the Profiles have conflicting configurations associated with them, it can be difficult to troubleshoot why a device is behaving in a certain way. Therefore, in order to simplify things, we do not have any Profiles applied to devices from the top organizational level.
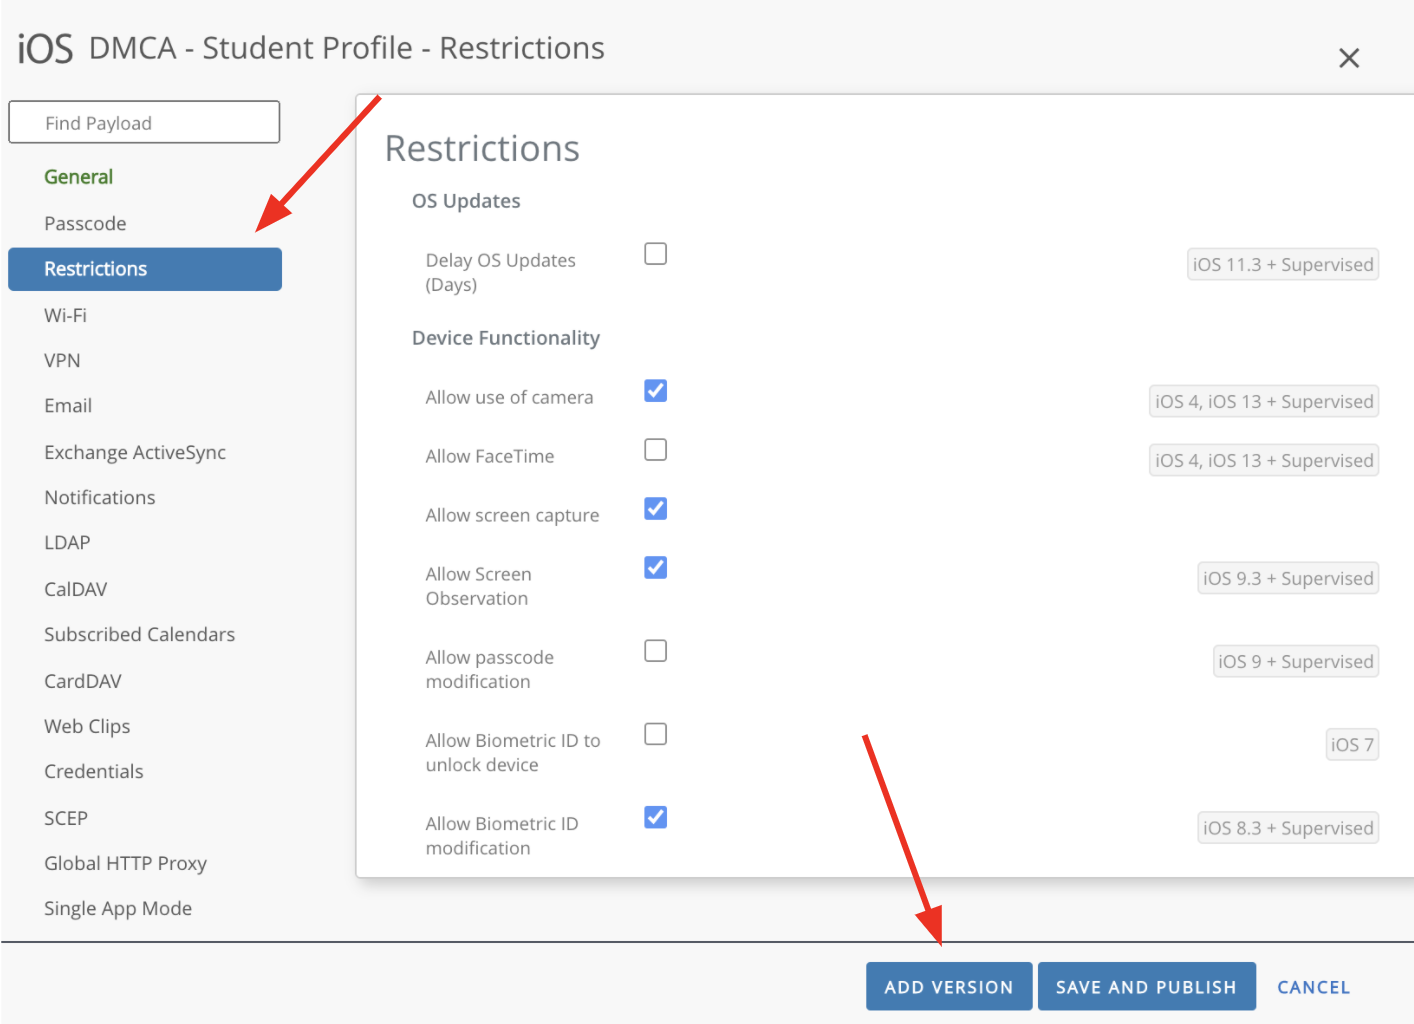
To view or modify Profiles, click Devices (from the navigation menu on the left) and click Profiles & Resources and then click Profiles. Each school has two Profiles by default: one for student iPads, and one for teacher iPads. The Profile's name includes the four or five character abbreviation for each school. For example, the Profile for the student iPads at Divine Mercy Catholic Academy is called DMCA - Student Profile - Restrictions (the name may be truncated depending on the size of your window). Click on the name of the Profile and then click the green "Restrictions" on the left side.

If you see at bottom at the bottom which says Add Version, then you should click it. You will not always see it. It may not be obvious, but you can scroll down in this window to view additional options. There are over 100 configurable options within the Restrictions section. If you have questions about how a particular restriction works, send an email to desales-grant-device-management@googlegroups.comm or you could just do a Google search and you will likely find some additional information.
If you modify a Restriction option, click Save And Publish and then click Publish. Workspace ONE will try to push this change out to all affected iPads, but it might not go into effect immediately on all iPads. From an iPad, you can force it to download an updated Profile by tapping on the Hub app, tapping This Device, and then Send Data (if you do not see This Device, then tap the left-pointing arrow in the upper left corner).
