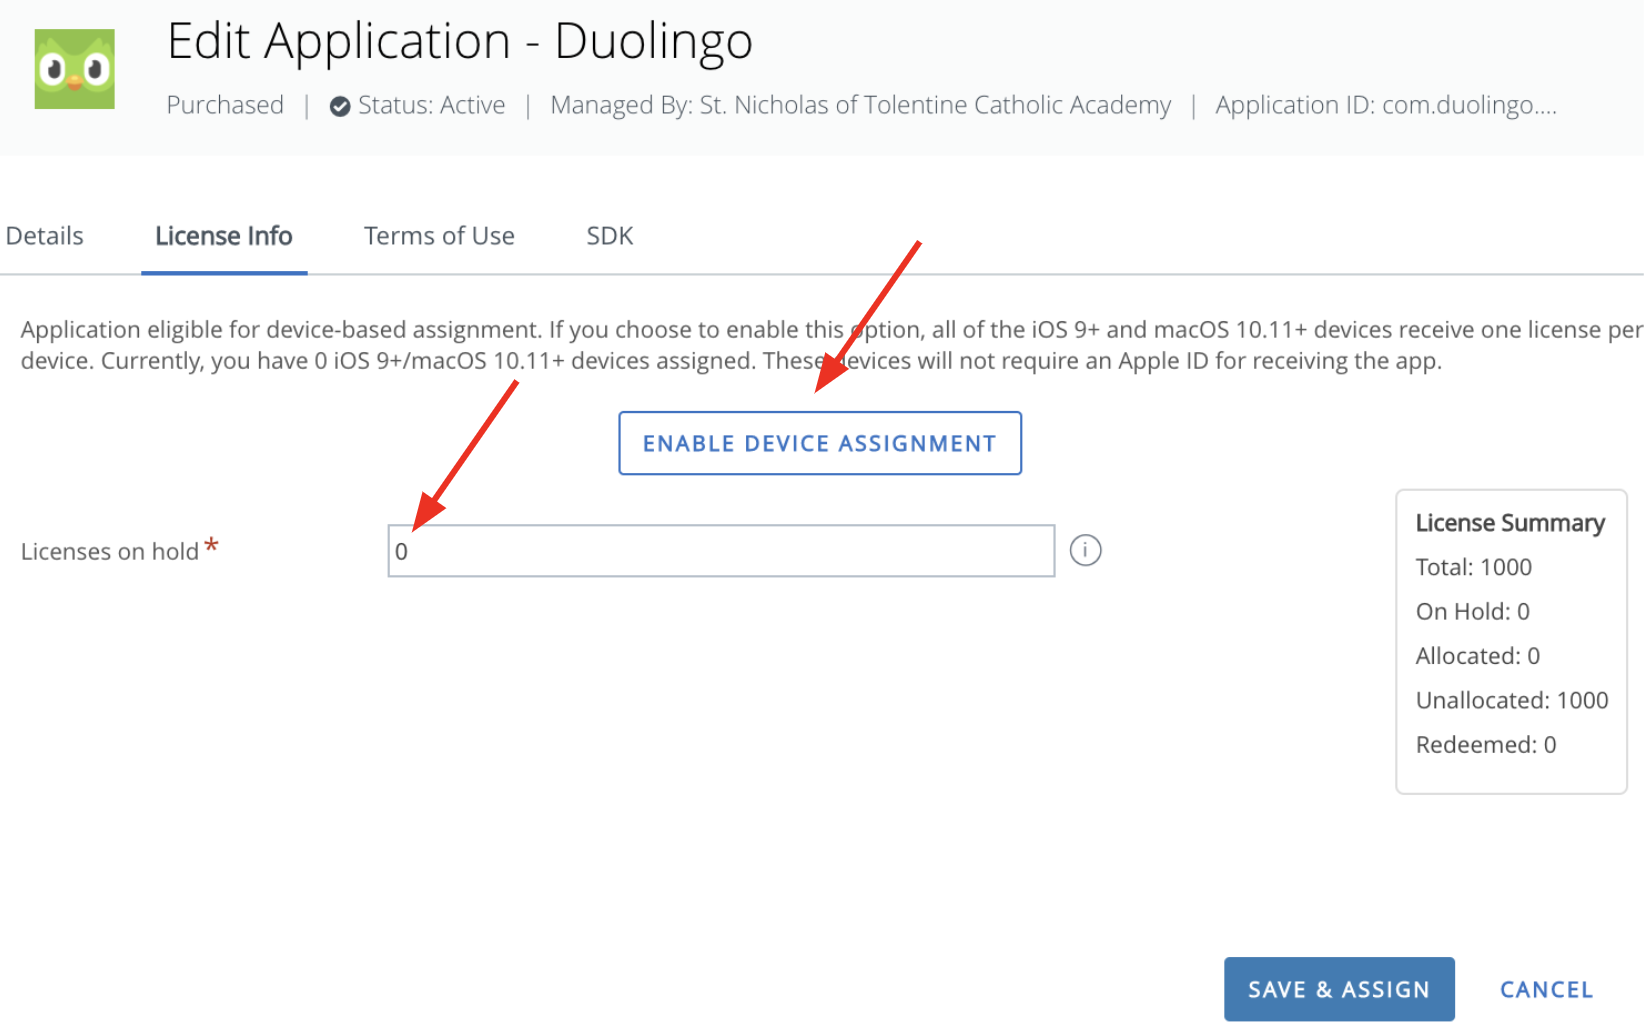
Click on the name of the app. The first time you click on an app, you will need to click the Enable Device Assignment button. By default, apps are assigned based on the Apple ID of the user that is logged in. Because we do not allow students to login with their Apple ID, the app will never install unless you change it to use Device Assignment. Once you click this button, you will never see it again.

In the field for Licenses On Hold, leave the number as zero. The only reason why you would ever want to hold licenses would be if you did not want to deploy them. Click Save and Assign.

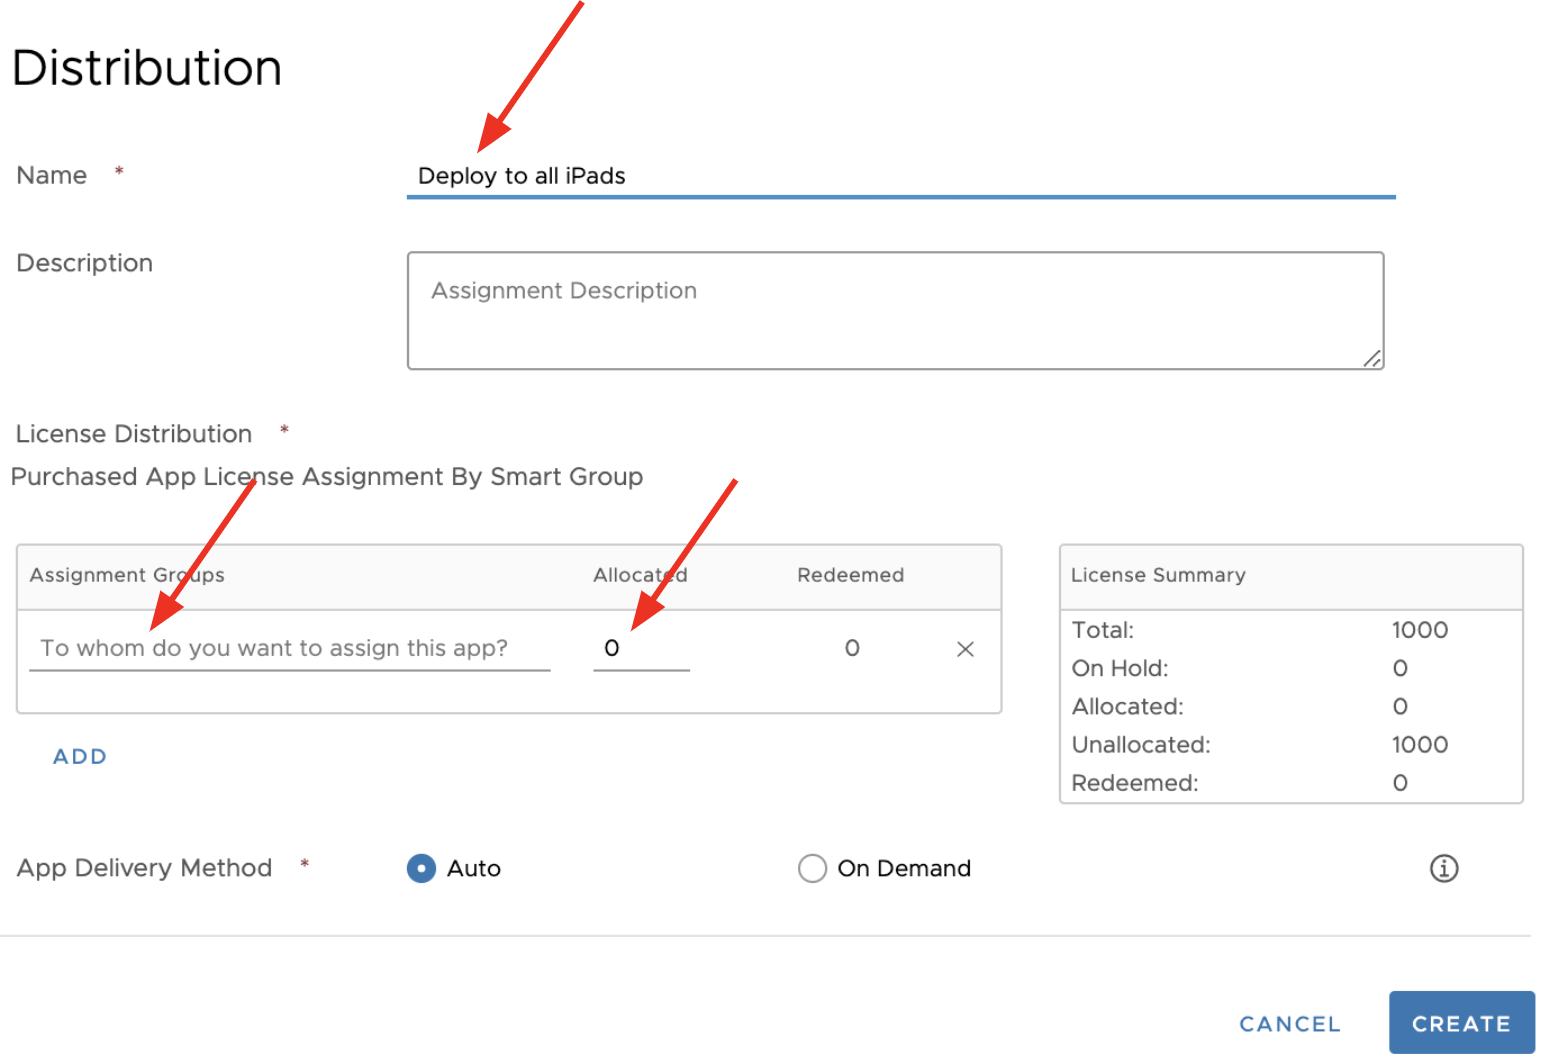
Enter the following info:
- In the Distribution window, enter a name. I recommend that you enter a note indicating if this app will be deployed to all iPads, only Student iPads, only Teacher iPads, or to a Smart Group.
- Click where it says To whom do you want to assign this app?. Select your school name (to deploy to all iPads), or select either Students, Teachers, or a Smart Group.
- In the Allocated field, enter a number that is less than or equal to the total number of licenses you purchased from Apple School Manager, and also is greater than or equal to the number of iPads to which you plan to deploy the app.
- Leave the radio button for Auto selected.
